total solar eclipse. Our offices will reopen on April 11th at 10:00 AM local time. We apologize for any inconvenience.


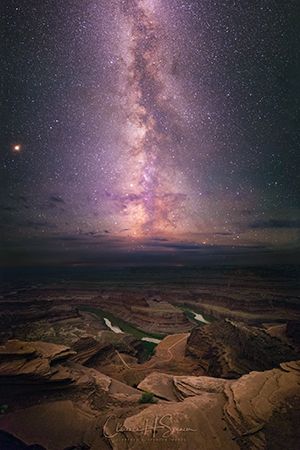
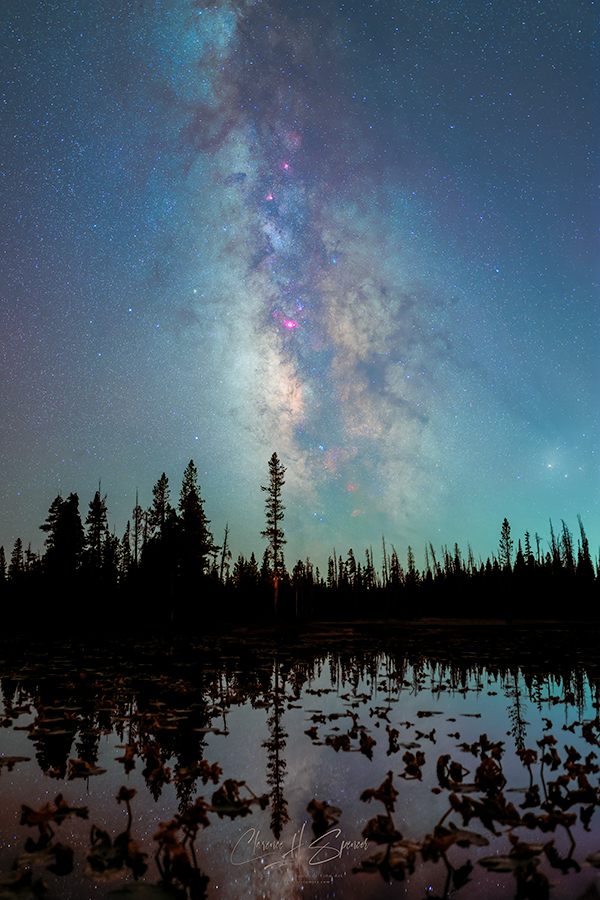
Nightscape and Night Sky Photography Tips - Part II - Milky Way.
Suggestions for nightscape and night sky Milky Way photography:

One of the most popular types of modern photography is Milky Way Nightscape or Astroscape photography. With the advent of digital camera technology it has become much easier to capture clear, vivid, and sharp images of the Milky Way and other dark sky subjects. Here are some suggestions and tips for capturing great images of the Milky Way and surrounding subjects.
Know your camera and "Be Prepared":
Memorize the buttons and functions of your camera so you can almost use it with your eyes closed if necessary. You don't want to be turning on your light, disturbing other night photographers or disturbing your night vision, in order to check which buttons you are pressing. Even RED light is disturbing to other photographers that are in middle of capturing an image.
Dim your camera LCD. In dark situations your LCD should be very dim to accurately display the exposure. Many photographers return home and there exposures are darker than they expected because the camera LCD was too bright and didn't portray the images accurately. Expect your eyes will be more sensitive in dark situations.
Be ready for as many situations as possible. Bring extras of everything; batteries, lighting, hand warmers, water, snacks, and warmer clothing. Know where everything is located inside your bag and be able to find it by feel if necessary. Be prepared to get comfortable and able to stay put in the same location if needed to wait for the correct alignment of the Milky Way or other dark sky object.
Lens selection:
Choosing a high quality lens that will produce sharp and clear images of the night sky cannot be over stated. A very wide-angle fast lens with aperture setting of f:2.8 or small is best. This will allow more light to enter the camera and allow shorter exposures with lower ISO settings, thus creating less digital noise or grain in your images. Some of our favorite lenses are the following:
- Canon EF 16-35mm f:2.8 USM L III
- Canon EF 16-35mm f:2.8 USM L II
- IRIX 15mm f:2.4 Blackstone
- IRIX 45mm f:1.4 DragonFly
- IRIX 150mm f:2.8 DragonFly
- Nikon AF-S 14-24mm f:2.8
- Sigma Art 14mm f:1.8
- Sigma Art 28mm f:1.4
- Rokinon 14mm f:2.8
- Rokinon 24mm f:1.4
It's possible to acquire good night sky images with other lenses or even "kit" lenses but the results won't be quite as good. Many of our customers shoot using kit lenses with great result but noticeably less quality as compared with images captured using better lenses.
Focus is critical:
It's very critical to have your camera focus as sharp as possible. Visit Part I of our nightscape tips for detailed instructions on achieving sharp focus.
Rule of 500:
For standard tripod use, a basic understanding of the Rule of 500 is important in order to avoid star movement or streaking when photographing the Milky Way or other dark sky objects. By calculating the maximum exposure length for your lens you will be able to maximize the duration of your exposure without creating star streaks/trails. Here's how you calculate the maximum shutter speed/exposure length for the lens you intend to use for your nightscape photography:
Divide 500 by the focal length of your lens (full frame or 35mm equivalent) and the answer will be the maximum amount of exposure (in seconds) that you can use without seeing star streaking/trails in the resultant image. Example: 500 divided by 14mm (lens focal length used) = 35.71 seconds. We prefer to adjust the exposure time down a little to insure no star trails will be seen. In the earlier example we would prefer to adjust the exposure to 30 or 32 seconds to insure sharp stars.
Of course, the rule of 500 can be ignored if using a tracking or auto-guided tripod or mount. Your night sky exposures can be significantly lengthened if using a mount that tracks the rotation of the earth, thus allowing longer exposures with little to no star movement. The longer the focal length of your lens the more accurate the tracking system must be.
Always shoot in Manual:
Shooting test images often is critical. This allows you to check, recheck, and adjust exposure and composition frequently. Always shoot with your camera set in full manual mode (M). We recommend shooting in complete manual mode including shutter speed, aperture, focus, white balance, etc... As most professional photographers will advise learn how to use manual mode when possible. In general, set your shutter speed to the maximum duration allowed by using the rule of 500. Then set your aperture to the desired setting (usually wide open), then adjust your ISO as necessary after each test exposure until your images are acceptable. The key is keeping your exposure short enough for sharp stars, and aperture wide enough to allow lower ISO setting. This will give the cleanest image results possible.
Custom White Balance:
Using a Custom White Balance is best. Set your custom white balance during the day using the filter configuration (if any) you intend to use for your night shooting and use direct sunlight as your light source. If your camera allows, store many different custom white balance settings for each possible filter configuration you may possibly use. This will allow you to reset or change the custom white balance setting when on location without the need of a light source. Manual color temperature (kelvin) settings can be used but usually give less desirable results.
Solid Tripod and Don't Touch:
A well-built solid tripod is very important when shooting long exposures. Also, the ability to add dead weights to the tripod during windy conditions is a great option. Try to touch your camera as little as possible. Use a remote release or intervalometer for triggering the exposure. If a remote release is not available you can set the camera for delayed/self-timer release. This will limit vibrations and possible movement of the camera which will cause blurry results. Wireless or Wi-Fi release and camera controls are great options that work very well but can reduce battery life.
Lighting:
A great way to improve your nightscape photography is by highlighting interesting foreground objects by using light. Light-Painting was popularly used by briefly shinning a bright light and "painting" the subject for a cool effect. The results were often something like car headlights or a "happy mistake".
It's always better to have more control of your lighting and have the ability to fine tune the brightness, angle, and shadows for the desired result. A much better and more consistent technique is to use low power lighting that is projected on the subject for the entire exposure. This will provide a soft and natural lighting effect that is easily controlled. There are many portable LED panels available from Amazon.com or other sources which work very well. We recommend a dimmable LED panel that has a warming gel filter option which helps create a more natural feel in some circumstances.
As always, please contact us with any questions regarding this or any other product or service we provide: info@spencerscamera.com